
Are you searching for an alternative to Jenkins for your Java project? I sure was. I wasn’t all that interested in spending time and effort installing and configuring a local Jenkins server or even dishing out money to host one online, to start experimenting. What I found was an alternative which solved all those issues and got me quickly focusing on what I do best, code!
An Alternative to Jenkins for Java CI
If you’ve never heard of the company Shippable before then you really owe it to yourself to keep on reading. I’ll be going over how to setup a Java project in a Continuous Integration (CI) pipeline. The focus will be on how to …
- Setup a CI pipeline with Unit and Integration tests
- Generate Unit Test results report
- Create advanced test coverage reports (with Jacoco)
- Receive email notification with the build result
All of this can be done without going through the challenge of setting up and configuring a Jenkins server. These days, you just can’t find a free Cloud based Jenkins server for your open source projects anymore. Trying to configure a Jenkins server for you CI pipeline takes more time and effort than I’d like to invest when all I want to do is continue making progress on my code base.
Shippable is much easier to configure and it’s free for your open source projects – that’s a huge plus! Getting setup with a CI pipeline is really much faster and its done in a declarative way – via a YAML file.
What is Shippable?
Shippable is a platform that is all about simplifying the adoption of DevOps. Their platform makes it easy for us to run our applications through customizable CI and CD (Continuous Deployment) pipelines. Making it easy for us to build, test, and deploy anywhere – streamlines the process of shipping our applications.
If you have already jumped on the Docker bandwagon then you won’t be disappointed since their platform was designed with Docker technology at its core. Shippable runs your applications in Docker based Containers (nicknamed Minions) – not VM’s. This makes it very fast and scalable. Your free account will get you 1 free Minion which runs 1 build at a time (2 cores, 4GB RAM); I can only image how lonely 1 minion must feel 🙂
They also allow you to integrate with many third party tools, platforms and services out there, so they don’t have an opinionated view on what you have to use to build your pipelines. You can even choose to run your builds on your own machines instead of Shippable’s infrastructure if your concerned about security, improving build time, increasing Container resources etc … they call this BYON (Bring Your Own Node). Very flexible.
Continuous Integration with Shippable
You can easily setup a free account with Shippable by simply logging in with either your GitHub or your BitBucket credentials. Once logged in, your source code repositories will be synced up and visible to you. You can see how this looks like for my account, below.
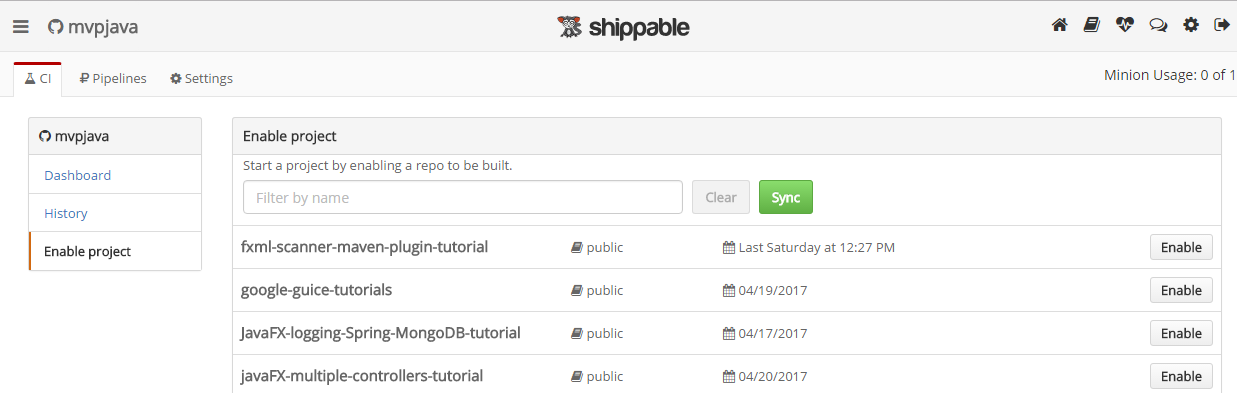
If your projects don’t show up, just click on the green “Sync” button. Now your ready to register your web hook to your code repository by clicking on the “Enable” button at the end of each row on the right.
This means that the next time you push a code commit, your application will automatically be tested (if you have tests!) and built for you. How does it know how to do this?
Declaritive Configuration Through shippable.yml
Shippable knows what to do based on the instructions expressed declaratively in a YAML file named shippable.yml which must be located at the root of the projects repository. Let’s look at a simple example below.
|
1 2 3 4 5 6 7 8 9 10 11 12 13 |
language: java jdk: oraclejdk8 build: ci: - mkdir -p shippable/testresults - mkdir -p shippable/codecoverage - shippable_retry mvn install - cp -r target shippable/codecoverage notifications: email: - your.email@gmail.com |
language: This is a mandatory tag that informs Shippable of the programming language used in your project so that they can select the right build image to run on your cute little minion (sorry, its hard to resist).
jdk: Is a ‘runtime tag’ which specifies the version of the language you want to run your build against. For Java, I specified the oraclejdk8 runtime (yes, you can choose openjdk8) . However, there are many available runtimes and we can even specify several; thus triggering a separate build against each. This gives rise to something called Matrix builds.
Continuous Integration Workflow Section
ci: This section contains all the commands needed for your Continuous Integration workflow. If any of the sequentially executed commands fail, the build will exit and you’ll receive email notification of the failure.
Shippable can provide reports for your JUnit test results as well as code coverage reports for Cobertura or Jacoco. The following is needed to get access to those reports.
- Create 2 directories /shippable/testresults and /shippable/codecoverage in order for the report parsing to occur
- Execute the build. The Maven command “mvn install” will run all Unit and Integration tests with the build. The shippable_retry is there to make sure that we retry a failed artifact download if ever we run into an intermittent network issue (tries up to 3 times).
I’ve opted for Jacoco instead of Cobertura since Cobertura does’t seem to support Java 8 Lambdas (parsing errors), Not to mention that it looks like its not being actively supported/maintained anymore (If I’m wrong, correct me below in the comments).
In order to take advantage of advanced code coverage reporting, it’s necessary to copy the entire target directory to shippable/codecoverage. This is required due to where Jacoco saves the reporting data (within target directory) and also because we want the advanced reports processed by Shippable. Trust me, its worth it!
Seeing the Results
In this demo, I Git pushed the code to my java-shippable-blogPost-demo GitHub Project. Shippable takes over by reading the shippable.yml file through the web hook. This is what you see on your Shippable dashboard once the build is over.

The above build reports green (success), which is obviously good but what about seeing some more details? What I like about the process is that you can see whats happening in real-time or after the build by clicking on the Status icon (green in this case). You’ll be taken to the console view where you can dig deeper into what happened at every step or even opt to download a logfile which contains all the output (via the Download button on the right of the image below).
I found the log file to be particularly useful when the build fails since the console view can be at times hard to navigate when there’s lots of output and you want to search through it.
Here’s how the console view looks like (without digging into any details)
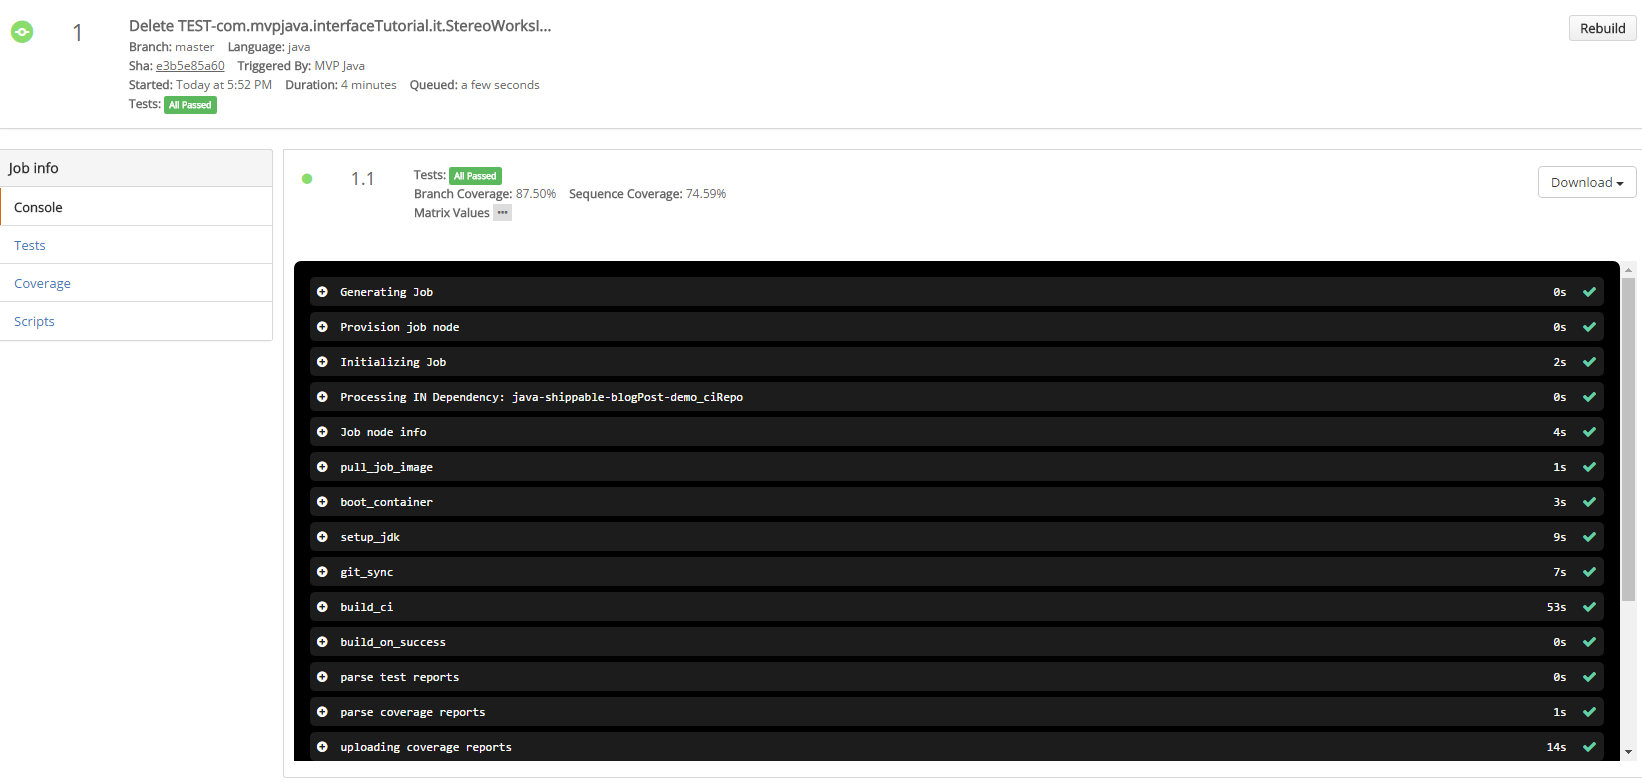
If your build fails along the way, its easy to investigate since you’ll get a red X on that step instead of a green check mark. Notice we get a quick test summary report indicating …
|
1 |
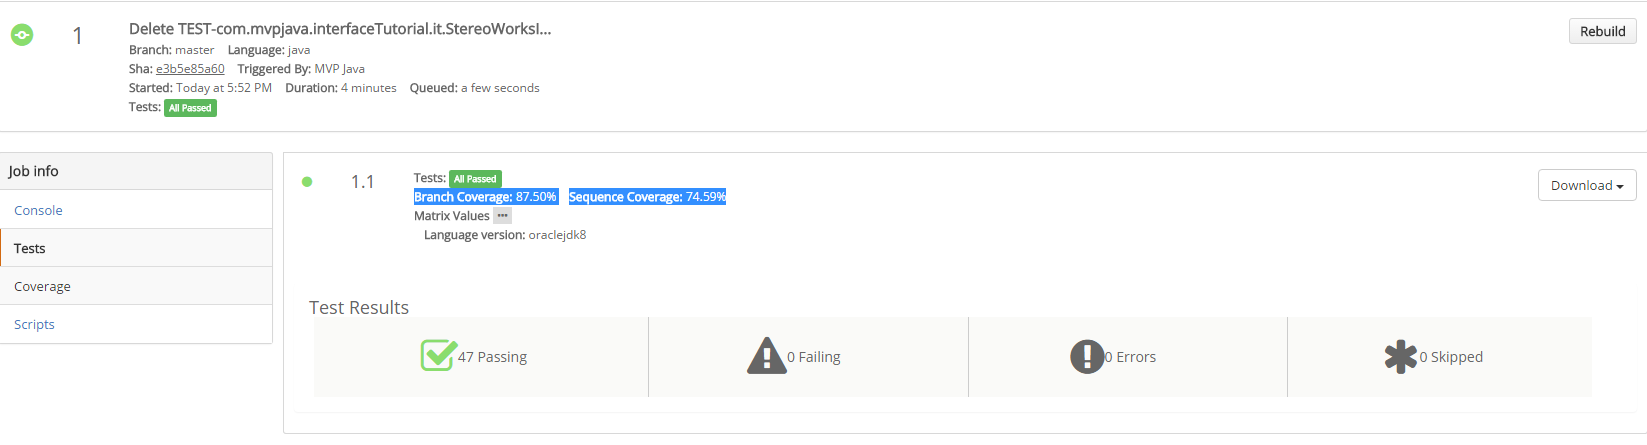
Branch Coverage: 87.50% Sequence Coverage: 74.59% |
If you click on the Tests menu link on the left, you get a visual high level summary of the test results.
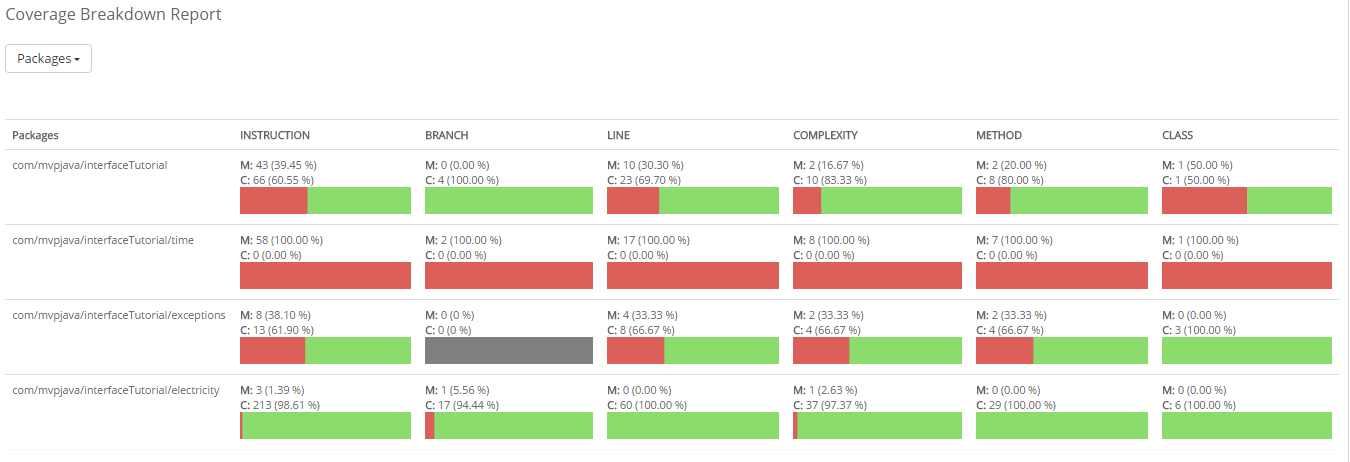
So now, we can finally check out the advanced Jacoco code coverage reports by clicking on the Coverage menu link on the left.
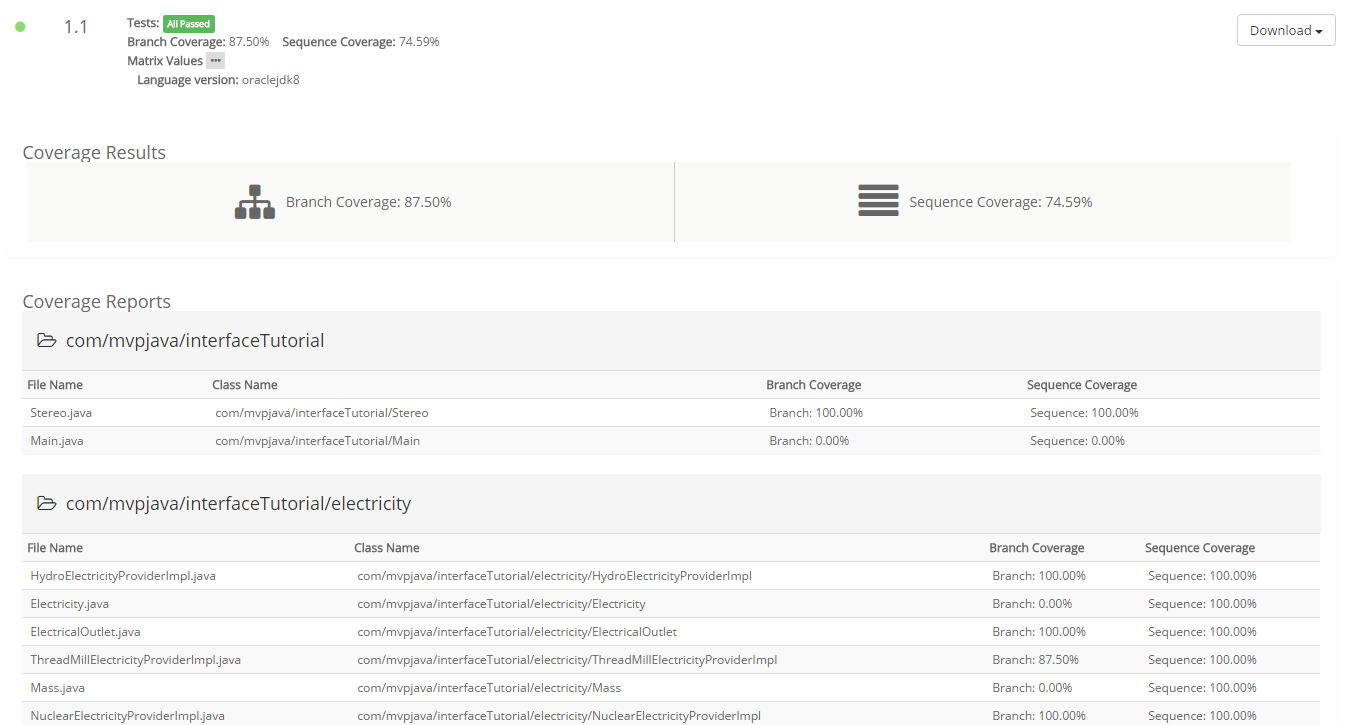
If you scroll down the page, you’ll see a “Show Details” button. This displays all the bells and whistles. Here’s a small section of that report below.
All builds are traceable back to your Git commit if ever you need to investigate a broken build introduced during the CI process. The results of the build will be emailed to you as specified in the shippable.yml file above (update email address under notifications section). You may want to configure the emails notifications section based on your use case.
Although I have just scratched the surface, I hope I’ve enticed you to give Shippable a try and explore further.
If your interested in seeing more (includes DockerHub Integration), then move on over to my YouTube Video Tutorial: Java Continuous Integration with Shippable where I take you by the hand and walk you through it.
Happy CI.
The Java project is available on GitHub.
This is really a great tutorial Andy. Yes, for sure Shippable can replace Jenkins for Java CI. Thanks for sharing it!